

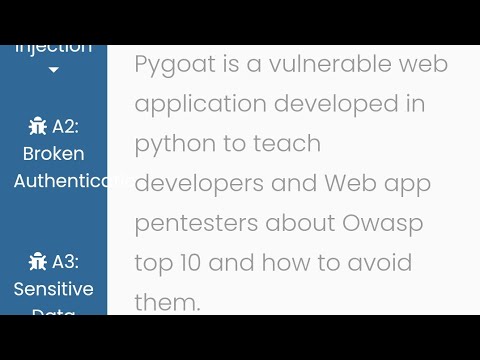
intentionally vuln web Application Security in django.
our roadmap build intentionally vuln web Application in django. The Vulnerability can based on OWASP top ten
Every lab runs in its own Docker container, so PyGoat needs Docker in all setups.
This starts PyGoat, Traefik and everything the labs need.
- Install Docker with the Compose plugin. Ports
8000,80(Traefik, serves the labs) and8080(Traefik dashboard) must be free. - Clone the repository and start the stack:
(Older Docker installs use
git clone https://github.com/adeyosemanputra/pygoat.git cd pygoat docker compose up -ddocker-compose up -d.) - The first run builds every lab image before the web app starts, which can take 10 minutes or more. Follow the progress with
docker compose logs -f migration. Later runs reuse the images and start quickly. - Open the app at http://lvh.me:8000 (not
localhost). Labs are served atlab-<username>-<lab>.lvh.meand are only accessible to the user who started them, which requires the login cookie to be shared across*.lvh.me. - Stop everything with
docker compose down.
The
pygoat/pygoatimage on Docker Hub is the old v2 release and does not include the v3 labs. Use Docker Compose instead.
To setup the project on your local machine:
First, Clone the repository using GitHub website or git in Terminal
  git clone https://github.com/adeyosemanputra/pygoat.git
  ### To Download a specific branch
  git clone -b <branch_name> https://github.com/adeyosemanputra/pygoat.git
Then, download Traefik to your local machine in the Pygoat directory (if you are not using Docker Compose) from the Traefik releases page. Open a separate terminal and run the following commands:
For Linux/WSL -
tar -zxvf traefik_<traefik_version>_linux_<arch>.tar.gz
sudo ./traefik
For Windows (Powershell) -
Expand-Archive traefik_<traefik_version>_windows_<arch>.zip
cd traefik_<traefik_version>_windows_<arch>
./traefik.exe
If you face any issue while installation, kindly refer to the documentation
- Install all app and python requirements using installer file -
bash installer.sh - Apply the migrations and seed data:
python3 manage.py migrate
python3 manage.py seed_scoring
python3 manage.py populate_labs
- Finally, run the development server
python3 manage.py runserver. - The project will be available at http://127.0.0.1:8000
- Install python3 requirements
pip install -r requirements.txt. - Apply the migrations and seed data:
python3 manage.py migrate
python3 manage.py seed_scoring
python3 manage.py populate_labs
- Finally, run the development server
python3 manage.py runserver. - The project will be available at http://127.0.0.1:8000
- Install all app and python requirements using
setup.pyfile -pip3 install . - Apply the migrations and seed data:
python3 manage.py migrate
python3 manage.py seed_scoring
python3 manage.py populate_labs
- Finally, run the development server
python3 manage.py runserver. - The project will be available at http://127.0.0.1:8000
- Use Docker Desktop with the WSL2 backend. The labs are Linux containers, so they need it.
- Docker Compose is the easiest way to run PyGoat on Windows. For a source install, running it inside WSL2 (Ubuntu) works better than native PowerShell.
- On some Windows setups the
python3command is not available. Usepythoninstead, and make sure it points to Python 3. - Use Python 3.11. It is the version CI tests with.
- From Source using
installer.sh
- Without using
installer.sh
- Install with Mac M1 (using Virtualenv)
This section guides you through creating and integrating new vulnerability labs into PyGoat.
- Navigate to the
dockerized_labsfolder:
cd dockerized_labs- Create a new directory for your lab (use descriptive naming):
mkdir your_lab_name
cd your_lab_nameCreate the standard application structure with a Dockerfile, docker-compose.yml, requirements.txt (if using Python), a main application entry point (e.g., app.py, main.py, or equivalent), vulnerable endpoints or components relevant to the lab, and a README.md documenting the lab. The application does not necessarily have to be a Flask application—it can be any Python project (preferred, since this is part of Pygoat), or even another language if appropriate. Refer to existing labs in the dockerized_labs folder for examples and structure conventions.
Important: Add a /health endpoint in your app.py for container health check.
-
Access the Django Admin panel at
http://localhost:8000/admin/and navigate to the Labs section. -
Add a new entry with:
- Name:
your_lab_name - Build Location:
dockerized_labs/your_lab_name - Port:
<PORT_NUMBER>
(Alternatively, you can register it via Django shell or a custom data migration).
- Name:
Important:
- Check the database or Django Admin panel for all currently used ports before selecting a new one.
- Use the same port number in
Dockerfile,docker-compose.yml,app.py, and the database entry.
- Navigate back to the project root:
cd /path/to/pygoat- Build and test your lab individually:
cd dockerized_labs/your_lab_name
docker compose up-
Access your lab at
http://localhost:<PORT_NUMBER> -
Verify the vulnerability works as expected
-
Stop the individual lab container
-
Add your lab details in base.html
-
From the PyGoat root directory, rebuild the entire application:
docker compose down
docker compose up --build- On Debian/Ubuntu based systems, you can use the
uninstaller.shscript to uninstallpygoatalong with all it's dependencies. - To uninstall
pygoat, simply run:
$ bash ./uninstaller.sh- On other systems, you can use the
uninstaller.pyscript to uninstallpygoatalong with all it's dependencies - To uninstall
pygoat, simply run:
$ python3 uninstaller.pyThanks goes to these wonderful people (emoji key):
 pwned-17 💻 |
 Aman Singh 💻 |
 adeyosemanputra 💻 📖 |
 gaurav618618 💻 📖 |
 MajAK 💻 |
 JustinPerkins 💻 |
 Liu Peng 💻 |
 Metaphor 💻 |
 whokilleddb 💻 |
This project follows the all-contributors specification. Contributions of any kind welcome!