Repository navigation
Getting Started
Welcome! This guide will help you install and start using the Work Item Decomposer extension in your Azure DevOps organization.
- Visit the Azure DevOps Marketplace
- Click "Get it free"
- Select your Azure DevOps organization
- Click "Install"
The extension requires the following permissions to function properly:
- Read work items - To access existing work item data
- Write work items - To create new work items in hierarchies
- Read project and team - To understand your project structure
Note
Organization administrators can install extensions for the entire organization, or individual users can install them for specific projects (if permitted).
After installation, you can find Work Item Decomposer in several places within Azure DevOps:
Context Menus (Right-click anywhere you see work items):
- Boards - Right-click any work item card
- Backlogs - Right-click any backlog item
- Sprints - Right-click any sprint item
- Queries - Right-click any work item in query results
Work Item Details:
- Open any work item
- Click the "..." (more actions) button in the toolbar
- Select "Decompose work item"
You can customize the extension's behavior and view the work item hierarchy it uses:
- Go to Project Settings → Extensions → Work Item Decomposer
- Configure general settings for the extension
- For work item type settings, you can configure globally or per area path
- View the current work item type hierarchy configured for the project
Tip
While configuration is optional, setting up work item type settings can make hierarchy creation more efficient! You can configure different tags and assignments per area path for team-specific workflows (e.g., Platform, UI, DevOps teams).
Let's create a simple hierarchy:
-
Select a work item - Navigate to any work item in your project
-
Open the decomposer - Right-click and select "Decompose work item"
-
Build your structure (choose one method):
Option A: Manual Creation
- Click "+" (Add Child) to add items beneath the current level
- Choose the work item type from the dropdown
- Enter a title for the new item
- Use "+" (Add Child) to add children to current level items
Option B: Text Hierarchy (BETA)
- Click the "Create hierarchy from text" button in the decomposer panel
- Enter text using the format
Type: Titlewith dashes for nesting - Review validation feedback and click Create
- Visit Project Settings → WIT Hierarchy for examples and AI prompts
-
Save your hierarchy - Click "Save" when ready
Tip
The Text Hierarchy feature lets you create complex structures faster by pasting AI-generated breakdowns. See Text Hierarchy for details.
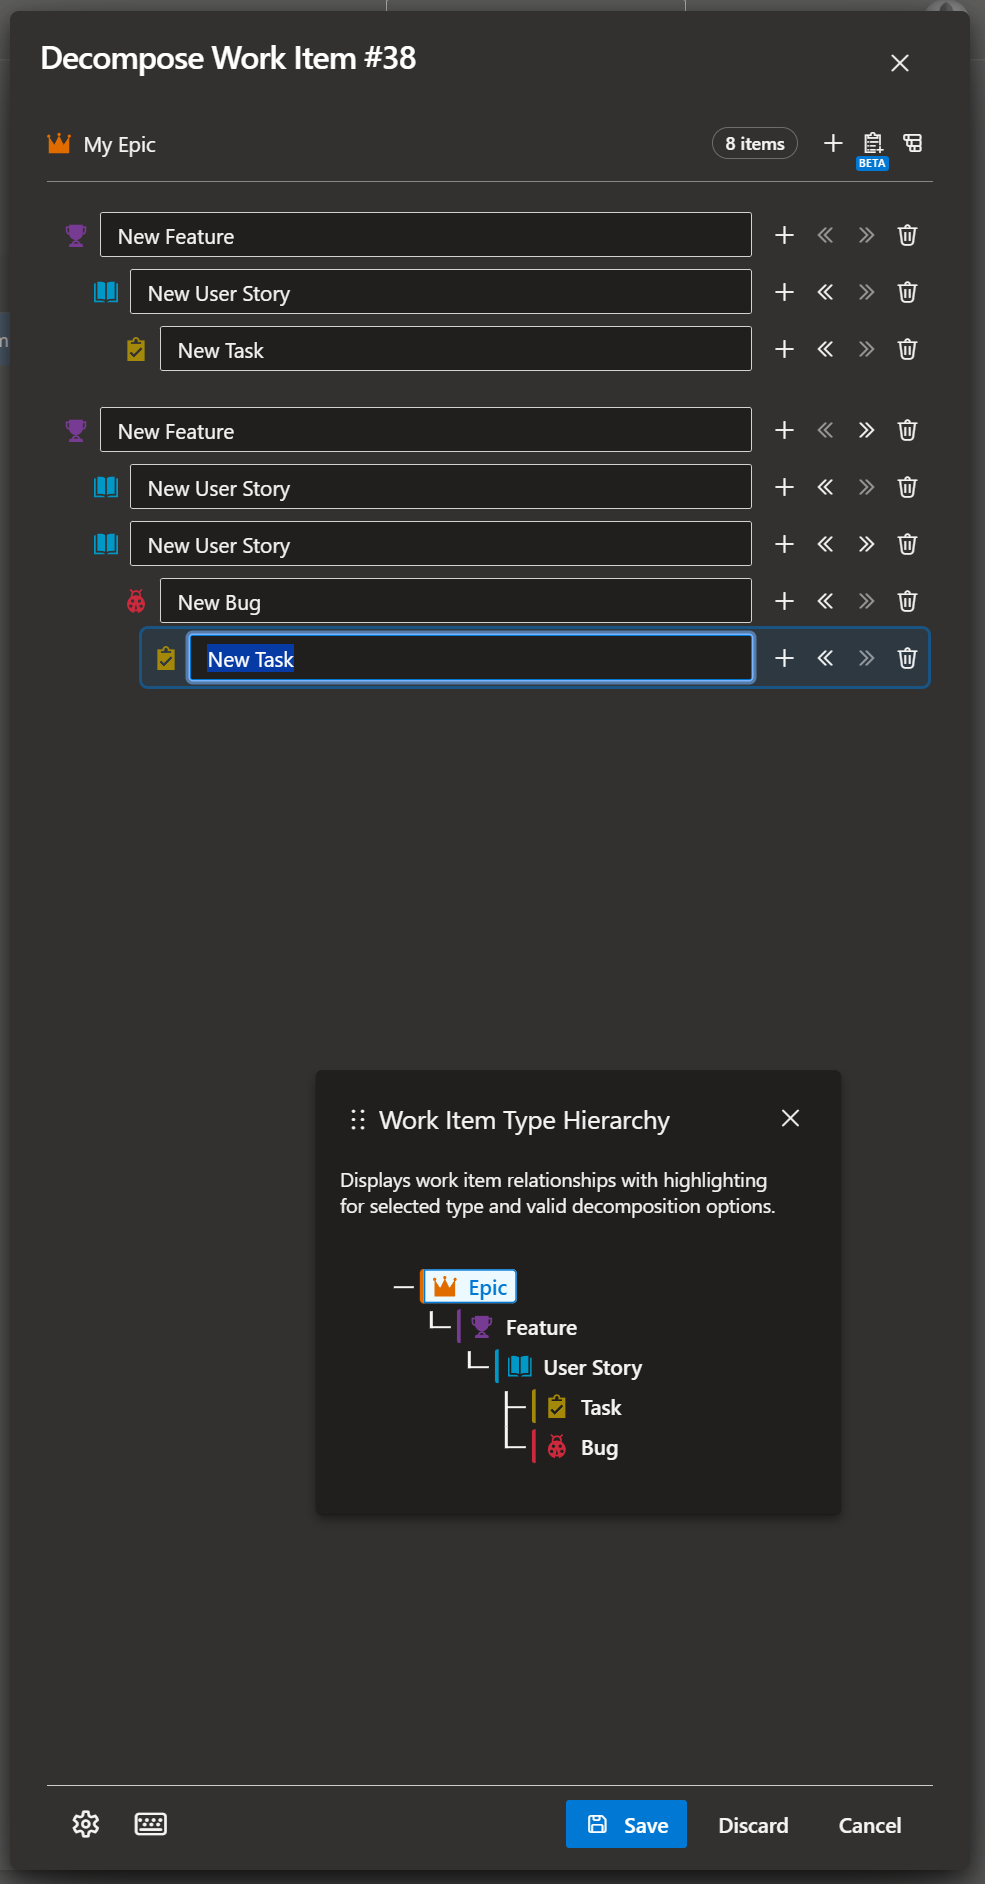
- Tree View: Visual representation of your hierarchy
- Work Item Types: Dropdown menus for selecting item types
- Action Buttons: Add, remove, promote, and demote items
- Title Fields: Editable names for each work item
- Text Hierarchy: Import AI-generated or manually typed hierarchies (BETA)
The extension supports full keyboard navigation. Press Alt + H while in the decomposer to see all available shortcuts.
Now that you're set up, explore these topics:
- Features - Learn about all available features
- Text Hierarchy - Create hierarchies from structured text
- Project Settings - Advanced configuration options
Need help? Check our FAQ, Troubleshooting or create an issue on GitHub.